Materials Needed:
Plywood (your desired dimensions and thickness)
About 3 yards of fabric of your choosing
Foam or bed egg crates
Elmer's Spray Adhesive
An old curtain, sheet or any other fabric the same size as your main fabric
Staple gun
French Cleats
It took me about an hour to do the whole thing. When I was reading other blogs some posters said it took them six hours...that must be one amazing headboard because while mine isn't exactly professional quality or perfect I think it's pretty darn good!! I went to Walmart and purchased 3 yards of white fabric with a really gorgeous damask print on it. Just for all of you out there wondering, three yards was A LOT of fabric and I had about a yard and a half left over but I'll make pillows out of that!
I also picked up a sheet of 1/2 inch plywood at home depot, they cut it for me (even though my boyfriend is a carpenter & engineer- this is me hinting he didn't take par in my "girlie" project). I did 1/2 inch because a) I didn't want to rip the wall off b) half inch was cheaper and c) its a lot easier for me to maneuver (I;m only 4'10!!) Word to the wise, ask a male for help, they'll be much nicer than the women...I know this from experience. Anywho, they cut it 38" by 56", yes 38" is big but about 8 or so of those inches will be covered by my mattress and I have about a bazillion pillows as well.
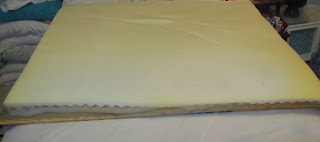
I already had two old egg crates from my bed at my house so I used those. I actually read somewhere that these were perfect because not only is foam stupidly expensive for what it is, these crates are also hella easier to cut!! I used one egg crate and cut it in half and realized I wanted more cushion so I used half of the other one too. I stacked them on top of the wood to see if they fit and then I spray adhesived them one by one on top of the wood.
It says to let it sit for an hour but I don't have that kind of time on my hands so I waited about 10 minutes and then I flipped it over. For this part I had about 5 sheer drapes laying around that I needed to get rid of so I used them as a way to secure my foam on the wood and to make sure you couldn't see the foam through the fabric (which was kind of thin). I only used one sheer and I folded it in half. Really any fabric will do to keep the foam on the wood as long as you cant see it through the main fabric.
I went around the edges and pulled the fabric to make sure it was tight then secured it with staples about 2.5 inches apart. If you're going to use a staple gun an electric one is a lifesaver!!! However, if you're as small as I am you may need an extra hand, I had trouble getting the staples in all the way because I wasn't heavy/ strong enough to keep the gun in contact with the wood! I started on the left side then did the right side. Then top and bottom respectively.
After the sheers were stapled on I laid my fabric down with the pattern facing my bed so I could lay the headboard back down onto it. I will say that I narrowly escaped a fabric emergency by not adding too much height or thickness to my headboard because Walmart fabric is usually only 44" wide! So I was about an inch and half from the edges on the top and bottom! I repeated exactly what I did with the sheers with the fabric but making sure the pattern was straight!! I flipped it right side up and voila!!! I am so happy about how it came out!!
I haven't hung it up yet because I haven't put it in my apartment yet but, thats what the French Cleats are for. You can find them at home depot, I love them and use them for anything I need to be hung straight and that wont fall! As soon as I hang it up this weekend I'll post a picture!!!!
I did this entire project in my room (yes I'm that obnoxious) and it was so much fun!!! If it wasn't 2:30 am right now I'd post my computer chair diy but I have to work at 9 and it's been a long day, so I'll post that tomorrow!! Let me know what you think and I hope I helped someone!!!!! =] -k


No comments:
Post a Comment